Different Ways To Enable / Disable Microphone in Windows 10
Microphones also referred to as mic or mike come in a lot of varieties today. Generally, headphones these days come with a microphone and headphone capabilities. Let us say, we use our headphones only. In such cases, we can opt to disable our microphone and save some power. Also, there are stand-alone microphones available that can be connected to the PC. Generally, these devices are used over teleconference calls, etc so that your sound is heard by others. If a hacker gets hold of your microphone, he could listen to all your conversations. This could be dangerous. To maintain your privacy in such cases you can disable the microphone from your system.
In this article let us discuss 8 different ways to disable Microphone from your system
Method 1: The Easiest way – UnPlug It
If you are using a standalone microphone, the easiest way to disable it is by unplugging it from your system.
To enable it back, plug it on to the PC again
Method 2: From the Inline Mute Switch
Most of the stand-alone microphones and headsets with built-in microphones come with a switch/button in the cable. You can press it and turn it Off /Mute your microphone so that nobody can hear you.
Press the button again to enable it back again.
Method 3: From Device Properties
Step 1: Press Windows+r buttons together from your keyboard to open the Run window
Step 2: In the Run window that opens, type ms-settings:sound and hit Enter

Step 3: In the Settings –> Sound Window that opens , Under Input Section ,
- From the drop down Choose your input Device, select your microphone
- Click on Device properties

Step 4: In the Device properties window, Tick on Disable

Step 5: To Enable Microphone again, Untick on Disable

Method 4: From Microphone Settings
Step 1: Press Windows+r keys from your keyboard together to open the Run window
Step 2: In the Run window that opens, type ms-settings:privacy-microphone and hit Enter

Step 3: In the Settings–> Microphone window that opens , Under the Microphone access for this device is on section , Click on Change

Step 4: In the pop-up window, in order to disable your microphone, toggle the button to turn off(the button will be displayed in white color) under Microphone access for this device


Method 5: From Control Panel
Step 1: Press Windows+r keys from your keyboard at the same time to open the Run window
Step 2: In the Run window that opens, type control mmsys.cpl sounds and hit Enter

Step 3: To Disable your Microphone, In the appearing window,
- Go to the Recording tab
- Right-Click on your Microphone you want to disable.
- Choose Disable from the context menu
- Press Apply
- Click on OK

Step 4: To Enable your Microphone,
- Go to the Recording tab
- Right-Click anywhere in the blank area.
- From the context menu, Choose Show Disabled Devices from the context menu

Now, you can see the disabled devices in the window. From that,
- Right-Click on your microphone that you want to enable
- Click on Enable from the menu
- Press Apply
- Click-on OK

Method 6: From Device Manager
Step 1: Press Windows+r keys from your keyboard together to open the Run window
Step 2: In the Run window that opens, type devmgmt.msc and hit Enter

Step 3: To Disable your Microphone, In the device manager window that opens,
- Double click on Audio inputs and outputs to expand and look at the options
- Right-Click on your Microphone that is to be disabled
- Select Disable device from the menu

In the confirmation dialog that shows up, click on Yes

Step 4: To Enable your Microphone, do the following:
- Double click on Audio inputs and outputs to expand and look at the options
- Right-Click on your Microphone that is to be enabled
- Select Enable device from the menu

Method 7: From Manage Sound Settings
Step 1: Press Windows+r buttons together from your keyboard and open the run command window
Step 2: In the Run window that opens, type ms-settings:sound and hit Enter

Step 3: In the Settings –> Sound Window that opens, Click on Manage sound devices

Step 4: Scroll down and locate your microphone device.

Step 5: Click on your microphone device, and click on Disable button to Disable your Microphone device.

Step 6: To Enable your Microphone, Click on Enable button

Method 8: From Registry Editor
Please try out this method if none of the above-mentioned methods have worked. Registry changes are quite risky.
NOTE:
- You need to have Admin rights to make these changes.
- It is advised to take the backup of the registry before proceeding. To take a backup, In the Registry Editor–> Go to File –> Export –> Save your Backup file.
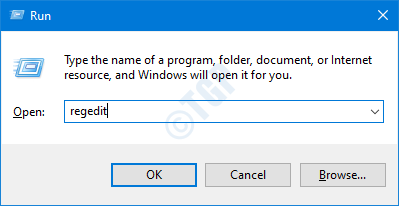
Step 1: Open the run window. Hold the buttons Windows+r from your keyboard at the same time.
Step 2: Type regedit and press OK
Step 3: In the Editor window, copy-paste or navigate to the following location,
HKEY_LOCAL_MACHINE\SOFTWARE\Microsoft\Windows\CurrentVersion\MMDevices\Audio\Capture

Step 4: When we double clik on the Capture folder, we see that it has a lot of subkeys(subfolders) with the GUIDs. Basically, these numbers indicate the GUIDs for the device connected.

Step 5: Now, our task is to find the subkey(subfolder) corresponding to the device we want to disable. We do this by trial and error method.
- Double-click on the subkey(subfolder) of your choice
- Double-click on Properties
- In the right-hand panel, scroll down and see if you can find the keywords that contain the name and device description of your device. For Example, in this case, HDAUDIO, IDT HighDefinition Audio CODEC
Repeat this process until you find the description and name microphone device you want to disable.

Step 6: Now that you have identified the subkey for your microphone device,
- Click on the corresponding subkey folder
- Double-click on DeviceState Registry DWORD
- Edit DWORD Value window opens
- Under Value data set the value 10000001 to disable the microphone
- Finally, Click on OK

Step 7: To Enable your microphone, In the Edit DWORD window set the value to 1 and hit Enter

That’s All. We hope you could Disable your Microphone with the above methods. Let us know in the comments the method that worked for you.
Thanks for Reading...
Masud Rana
No comments:
Post a Comment