How to disable BitLocker in Windows 10
Bitlocker is not such an essential tool for most users, but a very powerful one to secure your data with a confidential password. It helps add an extra layer of security to your device, which can be an internal hard drive partition, a volume or an external HDD, or any removable storage drives. It's of great importance to turn on BitLocker protection in companies, or the workplace that connected to public networks! However, some of you may think it not necessary when you work at home and store data on your personal computer. Will you be able to disable BitLocker in Windows 10 once it's already on?

***Note that BitLocker is not available on Windows 10 Home edition. It's a device encryption feature built in Windows 10 Pro, Enterprise and Education.
***Note that BitLocker is designed to protect data by providing encryption for entire volumes. To encrypt only files or folders on your computer, you shall find a file encryption program.
How to Disable BitLocker Encryption on A Single Partition (6 Ways)
Windows 10 allows you to turn off the BitLocker and on a drive in many places, and the following paths are all effective to reach:
Way 1. Turn off BitLocker via Windows 10 Control Panel
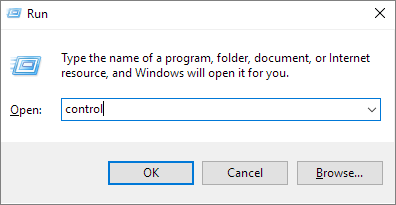
Step 1. Here use the most direct way to open Control Panel in Windows 10: Press Windows + R keys and type control/control panel in the Run box and hit OK.
Step 2. Click BitLocker Drive Encryption to open a new window.

Step 3. There you will see all the drive partitions. Find the target partition where displays (X: BitLocker on) and click "Turn off BitLocker" by expanding the down-arrow area.

Way 2. Turn off BitLocker via Windows 10 Settings
Step 1. Press Windows + I keys to open the Windows 10 Settings window.
Step 2. Click the System option.

Step 3. Go on with the About option at the bottom on the left and then BitLocker settings on the right.

Step 4. This will open the same [BitLocker Drive Encryption] window, so follow the same procedure in #Way 1# to choose an encrypted drive to unlock it.
Way 3. Turn off BitLocker via Windows 10 Command Prompt
Anyway, the manual solution provided in the Windows 10 Control Panel and Settings does the same to help you suspend the BitLocker protection on a hard drive. For those who are used to tackling issues in Windows Command Prompt, we also provide you with a guide.
Step 1. Press Windows +X keys and click Command Prompt (Admin) from the menu.

Step 2. Enter the below command line and hit Enter. The X: refers to your own drive that is currently locked by BitLocker. So, replace X with the correct drive letter of yours.
Way 4. Turn off BitLocker via Windows 10 PowerShell
It's another command method to remove the BitLocker protection from your drive. Still, for people who are not familiar with the command thing, the former two ways are good to go.
Step 1. Type powershell in Windows Search (Windows + S). Right-click on the result and select Run as administrator.

Step 2. Enter the below command line and hit Enter. X: represents a drive letter under BitLocker encryption. So, replace it with your own. Do not omit the quotation mark.
Step 3. (Optional) If it's to turn off BitLocker for multiple drives on your computer, you need to perform different command lines each by each:
Way 5. Turn off BitLocker via Windows 10 Local Group Policy Editor
Though Windows Local Group Policy Editor is an option to manage BitLocker drives, it's the most complicated method compared with the other four we gave to you. In spite of the fact, we still feel responsible to offer all the possible solutions including the last one here.
Step 1. Type group policy in Windows Search (Windows + S). If this is not a valid solution for you, open it in the Run box should be the easiest and quickest for everyone: Press Windows + R and type gpedit.msc in the Run box and hit Enter.

Step 2. After the Local Group Policy Editor is open, strictly follow the path to complete the whole process to disable BitLocker:
- Computer Configuration -> Administrative Templates -> Windows Components – > BitLocker Drive Encryption -> Fixed Data Drives
- Stay here and then select the Deny write access to fixed drives not protected by BitLocker option and double click on it

- Next, click either Not Configured or Disabled. Both are options to remove the BitLocker protection on the drive. Click Apply and OK to save changes.

Way 6. Turn off BitLocker via Windows Services
Windows Services are in charge of turning on or off all the services in Windows, including the BitLocker service. Here's how to disable BitLocker service permanently from the Services window.
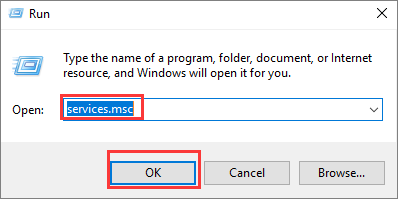
Step 1. Press Windows + R keys and type services.msc in the Run box and hit Enter.
Step 2. Under the Name tab, locate and double click on the BitLocker Drive Encryption Service option.

Step 3. Select Disabled from the Startup type lists and click Apply and then OK to save changes.

Thanks for Reading...
Masud Rana
No comments:
Post a Comment