Tuesday, June 7, 2022

How Do We Find Wi-Fi Passwords in Windows 11 (4 Methods)

How Do We Find Wi-Fi Passwords in Windows 11 (4 Methods)

 Earlier, there were reports that Wi-Fi was not showing up in Windows 11, and the Wi-Fi even kept disconnecting for some users, even after troubleshooting. In case you are still facing connectivity issues on your Windows 11 PC, you can forget the Wi-Fi network and reconnect to the same wireless network. That said, make sure you know the Wi-Fi password as you need it while reconnecting. If you don’t remember it, follow our guide and learn how to see Wi-Fi passwords in Windows 11. You can find saved Wi-Fi passwords in Windows 11 using five easy methods, so let’s check them out.


Find Wi-Fi Passwords in Windows 11 (2022)

In this tutorial, we have included five ways to find Wi-Fi passwords in Windows 11, including the Settings app, Command Prompt, Control Panel, PowerShell, and a third-party app. On that note, let’s dive in. Expand the table below and move to your desired section.

View Wi-Fi Password in Windows 11 Using Control Panel

You can find Wi-Fi passwords in Windows 11 via Control Panel’s Network and Sharing Center. Follow our instructions below, and you will be able to view the passwords of all saved Wi-Fi networks on your Windows 11 PC. Here is how it goes:

{}

1. First, use the Windows 11 keyboard shortcut “Windows + R” to open the Run prompt. Here, type ncpa.cpl and hit Enter. This will open the Network and Sharing Center directly within the Control Panel in Windows 11.


2. Next, right-click on the Wi-Fi network you are currently connected to. Then, click on “Status” in the context menu.


3. In the “Wi-Fi Status” pop-up window that appears, click on “Wireless Properties“.


4. Another window will now open up. Here, move to the “Security” tab and click on the checkbox next to “Show characters”. It will reveal the password of your current Wi-Fi network. This is the easiest way to see the Wi-Fi password in Windows 11.


Find Wi-Fi Password in Windows 11 Using Settings App

1. You can also find the Wi-Fi password in Windows 11 using the Settings app. Press “Windows + I” to open the Settings app and move to the “Network & Internet” section from the left sidebar.


2. Then, click on “Advanced network settings” at the bottom in the right pane.


2. Next, scroll down and click on “More network adapter options“. It will open the “Network and Sharing Center” in Control Panel.


3. Now, right-click on your “Wi-Fi” adapter and choose “Status” in the context menu.


4. Then, open “Wireless Properties” from the pop-up window that appears on your screen.


5. After that, in the next window, switch to the “Security” tab and enable the “Show characters” checkbox to reveal the Wi-Fi password of your current network. This is how you can view the Wi-Fi password using the Windows 11 Settings app.


Find Wi-Fi Password in Windows 11 Using CMD or PowerShell

If you want to find the Wi-Fi password in Windows 11 using Command Prompt or PowerShell, you can do so by following the steps below. We have demonstrated the steps in Command Prompt, but the same commands work in PowerShell as well.

1. Press the Windows key and type “cmd” in the Start Menu search bar. Now, click “Run as administrator” on the right pane. Moreover, if you always want to open apps as an administrator in Windows 11, follow our linked guide.


2. In the CMD window, run the below command to display a list of all saved Wi-Fi networks on your Windows 11 PC. Here, note down the profile name (it’s case-sensitive) for which you want to know the password.

netsh wlan show profiles


3. Next, run the below command with the following syntax. Just replace WiFi profile name with the profile name you noted in the step above.

netsh wlan show profile name="WiFi profile name" key=clear


4. Now, execute the command, and Command Prompt will display all the details for that particular Wi-Fi network. Then, scroll down and look for “Key Content” under “Security settings”. That’s the password of your Wi-Fi network.


See Wi-Fi Password of All Saved Networks Using a PowerShell Script

If you want to check out the passwords of all the saved Wi-Fi networks on your Windows 11 PC, you can do it with a PowerShell script. A GitHub user has created a handy script that lists all the Wi-Fi names and their passwords in a neat table. Here is how to use it.

1. First, open Notepad on your PC and paste the below code.

$listProfiles = netsh wlan show profiles | Select-String -Pattern "All User Profile" | %{ ($_ -split ":")[-1].Trim() };
$listProfiles | foreach {
	$profileInfo = netsh wlan show profiles name=$_ key="clear";
	$SSID = $profileInfo | Select-String -Pattern "SSID Name" | %{ ($_ -split ":")[-1].Trim() };
	$Key = $profileInfo | Select-String -Pattern "Key Content" | %{ ($_ -split ":")[-1].Trim() };
	[PSCustomObject]@{
		WifiProfileName = $SSID;
		Password = $Key
	}
}


2. Now, click on “File” in the top menu and select “Save as“.


3. After that, click on the drop-down menu next to “Save as type” and choose “All files”. Now, give a name to your script file. But make sure to add .ps1 (extension) at the end. Finally, save the PS1 file. Make sure to save the file on your Desktop. It will make things easier while running the script.


4. Next, press the Windows key and type “powershell”. Now, click on “Run as Administrator” in the right pane.


5. In the PowerShell window, run the below command to move to the Desktop.

Note: Download Sample .ps1 file Download-Link

cd ~/Desktop
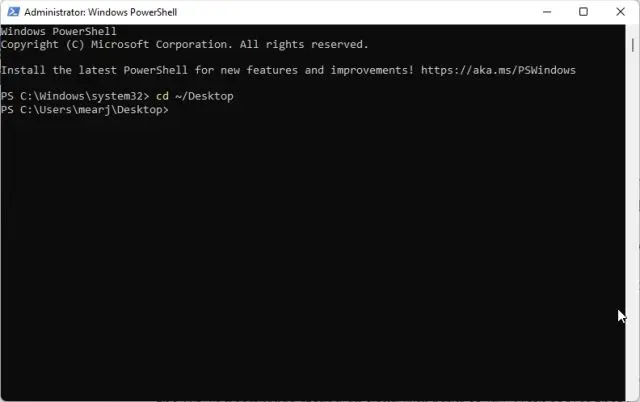

6. After that, run the below command. Make sure to replace filename with the script name. And that’s it. PowerShell will now display all the Wi-Fi passwords stored on your Windows 11 PC. How cool is that?

powershell -ExecutionPolicy ByPass -File Known_WiFi_Password.ps1


Quickly See Saved Wi-Fi Passwords in Windows 11

So these are the four ways to find Wi-Fi passwords in Windows 11. From individual Wi-Fi networks to all the saved ones, we have compiled the best methods to see the password of each network on your PC. Now, if you want to find the IP address in Windows 11 PCs, head over to our linked guide. And to find the Windows 11 Startup folder, follow our quick tutorial. Finally, if you have any questions, do let us know in the comment section below.

Thanks for reading...

Masud Rana

Thursday, May 26, 2022

How to find a Dell serial number and warranty information

 How to find a Dell serial number and warranty information


HOW TO FIND A DELL MODEL, SERIAL NUMBER, AND WARRANTY INFORMATION
 
If your Dell computer is not working, look for a label that has the serial number.
 
On Dell computers, the Dell Service Tag is the serial number. On a desktop, the label is probably located on the back of the computer case, but can also be located on the top or side of the system. On laptops, it is usually on the bottom, but look at the rest of the outside of the computer if you cannot find it.  It can also be under a flip tab. It will contain information like this:


If your Dell computer will not turn on you can go to the link below on another computer and fill in your service tag to find out about your warranty.

IF YOUR DELL COMPUTER IS WORKING, FOLLOW THESE STEPS.

If your Dell computer is working, follow these steps.
 
Go to https://www.dell.com/support. You may have to install Dell Support Assist in other for this to work (a link should be provided from this page). Once you have it, the model of your computer and Service Tag will show here.


Now you will see this.  You may click on View Details if you want more information.

To complete a Cherwell laptop support form, you may select as follows on this laptop:

Make: Dell Latitude
Model: 5480/5488
Serial Number: the entry beside Service Tag

Using the Command Prompt to locate your Dell computer service tag. 

From Laptops and Desktops

  1. Type cmd in the Windows search bar at the bottom-left of the screen, then select Command Prompt from the list of results.
  2. In the Command Prompt window, type wmic bios get serialnumber and press Enter.
  3. The Service Tag (Serial Number) appears as shown in the image below.


Thanks for reading...

Masud Rana

What Is the Bonjour Service and How to use it

What Is the Bonjour Service and How to use it


Apple products work well with other Apple products, but less so with Windows or Linux. It isn’t easy for a Windows PC to share files with a Mac, or for products like printers (typically designed with Windows in mind) to connect with a Mac. That’s where the Bonjour service for Windows 10 comes in.

Bonjour, meaning hello in French, allows for zero configuration networking between different types of devices. It can be used to find other Apple services on a network, connect to devices like printers (that provide Bonjour support), access shared drives, and more. Here’s everything you need to know about the Apple Bonjour service. 

Table of Contents


What is the Bonjour Service?

Apple devices can easily find each other, communicate with each other, and generally operate with a huge amount of interconnectivity. This is in contrast to Windows and Mac, two systems that can’t easily share data or services.

To help overcome this problem, and to make network configuration between devices easier, Apple created Bonjour, the combination of a number of networking services that allows other devices to find and communicate with Apple products.


Bonjour is integrated with Apple devices like Macbooks and iPads, so you don’t need to install anything extra on these to use Bonjour services. For Windows devices, however, you’ll need to install certain Apple software (like an older version of iTunes) to gain Bonjour support.

Bonjour isn’t an app, however. Installing the Bonjour service in Windows 10 allows Apple software (and some third-party apps) to find and communicate with other Apple products and services on your network.

Bonjour supports the discovery of Apple network services (such as file sharing), device sharing (such as network printers attached to a Mac), and network configuration (to set up a network with other Apple devices properly). 

This support is dependent on apps that support these features, as Bonjour is merely the technology that allows it to happen.


Do You Need the Bonjour Service on Windows 10?

The Bonjour service (mdnsresponder.exe on Windows) is integrated with some Apple software for Windows. If you want to make it easy to connect to services and attached devices that are linked to Apple products, then you may need Bonjour installed and enabled on Windows 10 for this to work.


The Bonjour service isn’t essential, however. If you don’t have Apple products on your network, then you probably don’t need it. Disabling it may prevent some Apple software or features from working, but it won’t have any other impact on your PC. It isn’t a system service of importance, like ntoskrnl.exe, so you’re free to switch it off.

You can also remove it entirely. Removing the Bonjour service may cause some Apple software to stop working, but only for older software. Bonjour is no longer included with the latest available version of iTunes, while other Apple software that required it, like Safari, is no longer supported on Windows.

Using the Bonjour Service on Windows 10

The Bonjour service (appearing as mDNSresponder.exe on Windows) isn’t something that can be interacted with directly. Instead, Bonjour is a service that works in the background, allowing other apps and software to communicate with other devices and services (including Apple products) on a network.


To use it, you’ll need software installed on your PC that supports Bonjour. This is harder to find, since while iTunes for Windows used to include Bonjour support, this is no longer available with the Microsoft Store version (the latest available version). You’ll need to install an older version of iTunes to do this instead.

You could also install other outdated Apple software, like Safari, but this is not recommended. Older software is usually coupled with bugs and security issues that could expose your PC to malware.

Apple has made part of Bonjour (mDNSresponder.exe) open-source, so you may be able to find support for it integrated into other third-party apps, hardware, and services. This is why support for Bonjour has been integrated into products like printers on a wider basis in recent years.

Disabling or Removing Bonjour on Windows 10

Like all running services, the Bonjour service may appear to use your system resources in Windows Task Manager. This will usually only happen when the service is being used to connect to other devices or services by Bonjour-supported software. 

However, if you don’t want Bonjour to do this, you can disable it, or remove it entirely. If you want to stop or remove Bonjour (mDNSresponder.exe) from your Windows PC, then you’ll need to follow these steps.

  1. To temporarily stop the Bonjour service, right-click the taskbar at the bottom, then select the Task Manager option.


  1. In the Services tab in the Task Manager window, find the Bonjour service. Right-click it, then select the Stop option. Bonjour will automatically restart the next time you restart your PC (or if you restart the service manually).


  1. To disable Bonjour entirely, select the Open Services button at the bottom of the Services tab in the Task Manager window.


  1. In the Services window, find the Bonjour service in the list on the right. Right-click the entry, then select the Properties option.


  1. In the Bonjour Properties window, change the Startup type option in the drop-down menu from Automatic to Disabled. If Bonjour is still active, select the Stop button, underneath the Service status information, to stop it immediately. Select the OK button to save your settings.


  1. To remove Bonjour entirely, you’ll need to use the Windows Settings menu. To do this, right-click the Start menu and select the Settings option.


  1. In the Settings window, select Apps > Apps & features. Search for Bonjour using the search bar, or scroll through the list until you find Bonjour listed. Select the Uninstall > Uninstall buttons to begin the process of removing it.


Once Bonjour is removed, you may need to uninstall other Apple software, like iTunes, to ensure that all traces of the Bonjour technology have been removed from your PC. The Bonjour service itself, however, should be removed at this stage.

Interacting with Apple Devices on Windows 10

With the Bonjour service on Windows 10, you shouldn’t need to worry about trying to access music, photos, and other files that are stored on Apple devices. Bonjour should help to give you easier access to Apple services on your local network, but with better networking features in Windows 10, you may find it isn’t needed.

Bonjour isn’t the only thing you’ll need in place to communicate between Windows and Mac devices. If you can’t see other computers on a network that contains more than one type of operating system, you may need to troubleshoot the problem further by checking that your firewall on both devices isn’t blocking the connection.


Thanks for reading...

Masud Rana

Saturday, May 14, 2022

Choose which OneDrive folders to sync to your computer

 Choose which OneDrive folders to sync to your computer

If you don't want to sync all of your folders in OneDrive to your computer, you can specify which folders you'd like to sync

Notes: 

  • You can choose which folders to sync only if you are using the new OneDrive sync client. Which OneDrive app?

  • Got Windows 10 or Mac 10.14? Then what are you waiting for? Save space with Files On-Demand for Windows or for Mac today!


  1. Select the white or blue OneDrive cloud icon in the Windows taskbar notification area.


Note: You might need to select the Show hidden icons arrow The Show hidden icons button. next to the notification area to see the OneDrive icon.

2. Select OneDrive Help and Settings iconHelp & Settings > Settings.


3. Select the Account tab, and select Choose folders.

4. In the Sync your OneDrive files to this PC dialog box, uncheck any folders you don't want to sync to your computer and select OK.


Note: You cannot add non-OneDrive folders (such as C: and D:).

Notes: 

  • If you uncheck a folder you are syncing to your computer, the folder will be removed from your computer. The folder and its contents will still be available online.

  • The sync settings you choose are unique to each computer unless you're syncing everything everywhere. Also, if you're choosing folders on two computers and you create a new folder on computer A that you want to sync to computer B, you'll need to go to computer B and select the new folder there.


Thanks for reading...
Masud Rana

Other Contents:


,,

Microsoft office broken copy-and-paste functionality in multiple versions of Excel

 Microsoft office broken copy-and-paste functionality in multiple versions of Excel A recent Microsoft security update (KB5002914) released ...