Wednesday, December 28, 2022

Microsoft Outlook does not work address/recipient from the Auto-Complete cache

 Microsoft Outlook does not add address/recipient from the Auto-Complete cache

Symptoms

As you add recipients to a new email message, Microsoft Outlook does not automatically suggest complete email addresses. You notice that after you send an email message to specific recipients, Outlook does not add those recipients to the Auto-Complete cache.

Cause

The Auto-Complete cache may be corrupted. When this occurs, Outlook may be unable add new recipients to the cache. If recipients are not added to the cache, Outlook cannot make a suggestion to automatically complete the email address.


The autocomplete feature on Outlook has always been a lifesaver as it lets you autofill the mail after typing just the initials. It can get very difficult to send simple emails when your outlook Autofill stops working.


Your outlook autofill might not work properly when issues related to AutoComplete Cache or Add-ins arise. When the cache system is full, the auto fills might stop showing up. Similarly, some applications add such features on your outlook which won’t let this AutoComplete feature work.


In this article, we are going to learn about the causes and fixes of this issue on your Outlook.

Why is My Autofill/Autocomplete Not Working?

There are various reasons why your Outlook might not be working. Some of the main causes are:

  • Disabled Autocomplete Feature: Disabling the Autocomplete feature on your outlook won’t let the autofills pop-up after typing the initial of the email.
  • Reinstallation of MS Office: When you uninstall and reinstall the outlook application, the list of autocomplete data might get lost in the system and won’t appear in the autofill pop-ups.
  • AutoComplete Cache: When the cache system of autocomplete gets full, the autofill might stop showing.
  • Add-Ins: Add-Ins get enabled with the installation of certain applications like iTune and so on which might cause problems with the autocomplete feature. It prevents autofill from appearing on the pop-up.
  • Hard Driver Crash: Going through a recent driver crash on your system is likely to cause such errors in your outlook.
  • Replacement of a New Computer: If you are using a new computer even if the home email account is the same, it won’t show the lists of autocomplete in this device.

However, you can easily retrieve it by sending the stream autocomplete file from your old computer to your new computer.

Fixes for OutLook AutoFill Not Working

There are several ways to make your autofill feature work again. Most of the fixes are bound to remove the previous Autocomplete data of your Outlook so make sure to keep this on your mind as you perform these methods cautiously. 

Empty AutoComplete List

The Auto-Complete Feature only auto-fills those emails that have already been introduced to your Outlook. If you have never sent a proper mail to a user before, then the autocomplete feature won’t show the pop-up for that user’s mail. If you are using Outlook for the first time and don’t know how to turn it on


Type Outlook on the search bar and press Enter

2. Tap on File and press Options


3. Tap on Mail on the left side and scroll down

4. Under Send Messages, check the “Use Auto-Complete List to suggest names when typing in the To, Cc, and Bcc lines” and press on the Empty Auto-Complete List option.


5. A confirmation dialogue box appears. Select Yes and click on the OK button


Update Your Office


A glitch or bug in your Outlook might cause such an issue. When your MS office isn’t up to date, it can make errors like an autofill pop-up not appearing after typing the initial.

To solve this, follow these steps:

  1. Tap on the Search icon on the Taskbar 
  2. Type Outlook and press Enter
  3. Tap on Files at the top left corner and click on Office Account
  4. Tap on the Update Options icon beside Office Updates
  5. A drop-down menu appears. Click on Update Now


This will download the office updates in your Windows. This might take some time, but you can use other tabs as well as the office while performing this update. 

Rename the RoamCache Folder

Though this method deletes all the prior auto-fills saved in your Outlook, it is very efficient and fixes your autofill to work back as usual. When your folder is full, the autofill feature might stop working, so following this method will help Outlook make a new folder for RoamCache. You can perform this in two ways:

  1. Go to Outlook and tap on File.
  2. Under Info, tap on Account Settings.


3. Choose either your Outlook Mail Account or Microsoft Exchange Server Account.

Using Outlook Mail

  1. Open Run and type %LOCALAPPDATA%\Microsoft\Outlook. Click on OK
  2. Right-click RoamCache folder and select Rename on the drop-down menu.


3. Rename the RoamCache to some other words like Old_RoamCache_folder, which makes it clear that it’s the previous roamCache folder 

4. Again, open the Outlook tab and see if autofill is working or not.


It will create a new roamCache folder the next time you list any emails on your Outlook. 

Using MS Exchange Server Mail

  1. Go to Account Settings and select your MS Exchange Server Mail
  2. Click on the Change button 
  3. Click on More Settings, and under Advanced, unselect the Use Cached Exchange Mode
  4. Click on the Finish button
  5. Then, type Run on the search bar and press Enter
  6. Type %LOCALAPPDATA%\Microsoft\Outlook on the bar and click on the OK button
  7. Under the Outlook folder, left-click the RoamCache folder


8. Rename the RoamCache to some other similar words, which makes certain that it’s the old RoamCache folder from before

9. Close Windows Explorer and open Outlook again

10. Go to Account Settings, select your mail and click on the Change button

11. Click on More Settings and now, select the Use Cached Exchange Mode and click on Finish 

Restart Outlook and check if the auto fillers are working or not. Since this method wipes all the previous data, you must list all the contacts again. After you follow these, a new RoamCache folder will open under the Outlook folder.

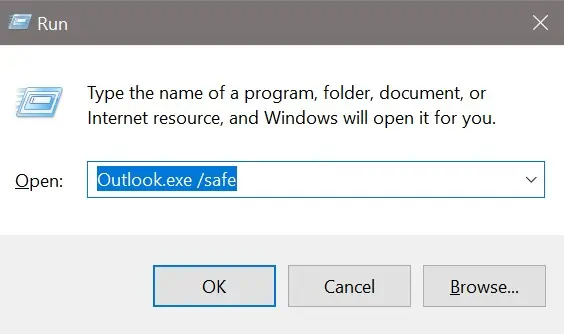
Open Outlook in Safe Mode

Safe mode helps you ensure whether the problem is hardware driver related or not. It makes the troubleshooting process easier and quicker. To launch safe mode,


  1. Click on the Search icon on the Taskbar
  2. Search for Run and press Enter 
  3. Type Outlook.exe /safe and click on the OK option


If this doesn’t work, use C:\Program Files\Microsoft Office\OfficeVersionNumber full path to open the outlook file and check whether the auto complete feature is working properly or not.

Disable Add-Ins

Add-Ins are the extra features available in your software. If the autofill works well in safe mode, the problem may be due to Add-ins. In such cases, we have to disable all of the add-ins first to see if that’s the issue or not. 

If the autofill starts working, we have to enable the add-ins one by one to find the faulty add-ins and remove them. Sometimes, installing other applications might give them the access to make changes in your outlook. In such cases, you can disable Add-Ins by:


  1. Open your Outlook and tap on File at the top left corner
  2. Go to Options and click on Add-Ins
  3. Select COM Add-ins and click on the GO button
  4. Uncheck all the Add-ins and click on OK.


5. Check if the issue is gone

6. If gone, go back to Add-ins and check the options one by one to find the culprit


Repair Outlook Data PST File

PST file also known as Personal Table Storage is where Outlook emails get stored. Inbox repair tool helps you figure out the errors in your outlook and fix them.

  1. Open your outlook folder in your Windows Explorer
  2. Click on the SCANPST.EXE file and tap on Browse option to select the file you want to scan
  3. When a dialogue box appears, click on the Start button
  4. Now, choose Repair in order to fix the errors.


This will repair all the errors in your PST file including the autofill error on your Outlook.

Check with Another Profile

To know whether the issue is with your outlook mail or the whole system, you can create another account or check with another profile. 


Thanks for Reading...

Masud Rana

Tuesday, December 27, 2022

How to Fix User Profile Cannot be Loaded in Windows 10?

How to Fix User Profile Cannot be Loaded in Windows 10?


    I. What Is User Profile Service & Why It Fails to login
    II. 6 Ways to Fix User Profile Service Failed the Logon Error

Is your Windows system not booting up because of a computer virus attacks. Still, the most common reason is when the default user profile logon is corrupt or does not have the proper permission. Follow this article to learn more about how to fix a user profile that failed the logon.


What Is User Profile Service & Why It Fails to login

The User Profile service is a directory that helps users store information like social tagging and helps users share and distribute each others' profiles across sites. This same user profile provides a service application with a SharePoint server. It helps to provide something akin to a command center where administrators can customize user profile login settings and attempt profile synchronization when they operate on multiple devices.

6 Ways to Fix User Profile Service Failed the Logon Error

Seeing as the user profile is typically the 'you' in your system, without it, you won't be able to access your system files and will keep getting login errors. For the user profile service failed the logon, the directory must have been corrupted, or there is a disk write error. Here are some ways to fix the user profile service logon failure.


  1. Method 1. Repair User Profile Using Command Prompt
  2. Method 2. Fix User Profile Service Failed via Registry Editor
  3. Method 3. Reset Windows PC to Fix User Profile Service Failed Error
  4. Method 4. Transfer NTUSER.Dat File to Default Username Folder
  5. Method 5. Create a New User Account
  6. Method 6. Disable the Customer Experience Program

Method 1. Repair User Profile Using Command Prompt


The first method to be explained is the Command Prompt method. Know that the command prompt is like a control center where you can make many administrative changes to your computer, so it's better not to single-mindedly mess with the command prompt unless you have a trusted guide to follow. That being said, you can fix the user profile service login error by following these steps.


Step 1. Launch Command Prompt

Quickly locate your command prompt by searching it in the search area. Right-click and select "Run as administrator."

Step 2. Scan

Type in SFC /scannow and hit enter. Note there is a space between the 'sfc' and '/'

Step 3. Restart

You can now restart your system to apply the fix.

If your profile error does not let you log in to your desktop, restart your computer in safe mode and select Command prompt from there.


Method 2. Fix User Profile Service Failed via Registry Editor


If the Command prompt fix doesn't work or you don't feel well about using the command prompt, you can try using the Windows Registry to fix user profile login failures.


Step 1. Search Registry Editor


Click on start and type in Regedit. Launch the application.

Step 2. Go to Profilelist

Follow the sequence below to get to the profilelist.

HKEY_LOCAL_MACHINE > Software > Microsoft > Windows NT > CurrentVersion > ProfileList

You will see a series of S-1-5 folders, which will generally have the same number as the profiles you have on your computer.

Step 3. Locate the corrupted profile


Now you just have to click on each S-1-5 to know which profile it belongs to. Do this by clicking on ProfileImagePath. The popup box will display the profile name so you can differentiate it.

Step 4. Change Value Data

Once you've located the profile, click on RefCount and change the value data to zero. You should do the same for "State" as well. Restart your computer to apply this setting.


Method 3. Reset Windows PC to Fix User Profile Service Failed Error


Either of the methods above may not work since there can be different reasons your profile got corrupted. One of the surefire ways to get your computer up and working again is to reset Windows. To do this:

Step 1. Open PC settings or boot up in safe mode

Open PC settings under Updates and security, and click on Recovery. Another way is to force kill your system a few times, and it will boot in safe mode automatically. Select Reset this PC.

Step 2. Reset options

First, you can try to reset your PC settings and see if that will fix it, but if it doesn't, you will have to format the whole system.

Step 3. Reset

You will be given a series of prompts to complete your reset, like your password, windows version, etc. Follow these prompts to get on with your PC reset.


Method 4. Transfer NTUSER.Dat File to Default Username Folder


When you create new profiles, Windows automatically creates an NTUSER.DAT file. This file is present in each profile, and deleting is equally deleting the profile. To fix profile user service login error;

Step 1. Log in

Log in to your system with the profile you want to recover. If it is not letting you log in at all, log in from another profile as long as it is not the one you want to copy your NTUSER.DAT from.

Step 2. Copy NTUSER.DAT

Go to Local disk (C:)>User and select the profile with the NTUSER.DAT you will use. Copy the .DAT file and paste it to the profile that has the login error.

Step 3. Sign out/Restart

After pasting the .DAT file, you can now log out of the account you are on and sign in to the old account once more.

Note: If you can't find the .DAT file, you need to check the 'Hidden item' box under View.


Method 5. Create a New User Account


Compared to the previously mentioned methods, creating a new user account is an easier way to fix the user profile failed logon error. Creating a new account doesn't mean losing all work on your system; you only lose the customized settings you made on your corrupted profile. Once you decide if you will create a Microsoft or just a local account, the rest becomes more straightforward.

Step 1. Open PC settings

Click on the start menu and search PC Settings. 

Step 2. Accounts and Users


Windows 10 and later would have Family and other users on the same page, while Windows 8 will have "Your account" and "Other accounts." Under Other users/accounts, click on Add account. Follow the prompts to create a new account.

Step 3. Restore files (optional)

If you want, copy files saved on your previous profile and paste them into the new one. Go to Local disk(C:)>USERS>profilename. Copy and paste all files into the Local disk(C:) >USERS > the new profile.

Note: Make sure you have a backup of user profile files before starting the process


Method 6. Disable the Customer Experience Program

Windows usually collect usage information from your computer every once in a while. No idea how the Customer Experience Program affects profile service login errors but disabling it can sometimes help solve the problem.

Step 1. Open Local Group Policy Editor


Open your start menu, search "gpedit. msc", and launch.

Step 2. Navigate to Internet Communication Settings


From Computer configuration>Administrative Template>System>Internet Communication Settings.

Step 3. Disable the Customer Experience Program


Double-click on "Turn off Windows Customer Experience Program," and from the pop-up box, check the "Enable" box, apply the change, and click OK.

Step 4. Restart

You might need to restart your computer for the changes to be thoroughly implemented.

Final Thoughts

The user profile service failed the logon is one of the most annoying Windows errors. If not well handled, you might lose the profile and your account. This article has gone through 6 different methods to solve it, from easy to some more complicated ones. Now, users can choose which way goes well for them. Be careful not to accidentally damage your computer since some methods work with administrative authority.

FAQs

1. What is meant by a user profile?

A user profile contains as much information as possible about the user. It includes many things, from their basic information to having social tags, documents, experiences, way of life, etc.

2. What does a profile reset do?

A profile reset returns all customized system settings to their default. Different from an account reset that completely wipes your computer and restores the system to default.

3. What is the difference between the user account and the user profile?

Your user profile is a collection of your preferences and customizations, while your user account is the basic information of the user in the system, which determines which features and permissions the user can access

4. How do I create a user profile?

Step 1. Open PC Settings and select Update and Security

Step 2. Click on Family and other users

Step 3. Click on Create a new user

Step 4. Choose whether you want to create a local account or a Microsoft account

Step 5. Set Username and password and proceed


Thanks for Reading...

Masud Rana

Dell XPS 13 Battery Replacement

If your Dell XPS 13 (also known as Dell XPS 13 Infinity Edge Ultrabook or Dell XPS 13 Skylake) has   lost its ability to hold a charge , you...